World Boss Strategies

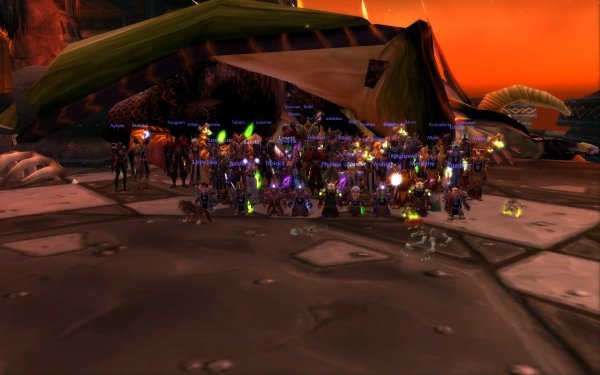
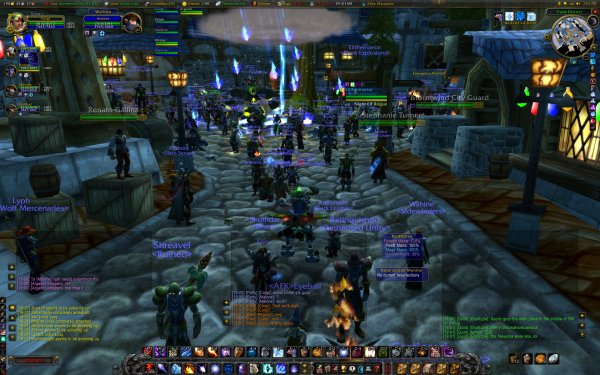
These are world bosses. This means that these bosses spawn sparadorically, and is not inside an instance. Any raid can engage the world bosses, and once dead, they cannot be killed again, until they respawns – often days later. Because kills of the world bosses are often competed for between guilds and alliances, it is important you follow the unspoken rules of conduct (however, these are spoken). Any breach of these rules can result in disciplinary action being taken, the least of which being you will not be invited to these raids again.

  1. Do not intentionally grief, attack or otherwise interefere with another raid attempt’s kill.
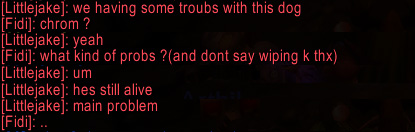
  2. Do not yell out saying die or wipe already.
  3. Do not train mobs onto a kill.
  4. Do not send tells/whispers or any other contact that can be construed as negative. Leave any coordination and communication to the raid leaders.
  5. Just because we’re there first does not give us claim to a mob. We have to organise and be good to go to have claim.
  6. Do not take up debuff slots by mind visioning, detect magic or any other enemy spell.
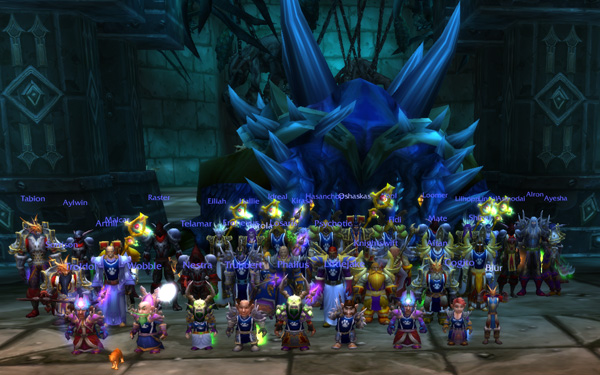
  7. Congratulate them after a kill!
  8. If they killed a boss, it was because they could organise themselves quicker. That does not make them farmers. Likewise if they fight with 60 players – thats their choice!
  9. If we are on a shared raid with alliance friends, your behaviour directly respresents how those guilds see our guild.

Outdoor raids can bring the worst out in players, and for this reason we will invoke a zero tolerance policy for any breach of the above. Penalties may range from not being included on these raids, to being blocked from MC signups, loss of DKP and/or removal from the guild.

Kazzak

Recruitment? OMG.

Never actually thought we’d say this, but we’re currently looking for Hunters to fill some spots in certain raids. If you want to become involved in AQ20 or ZG, and wish to be part of SI of course – now’s the time to apply.

Start by going here and filling out a decent application. Remember, your application is potentially the first thing we see of you – so don’t treat it shabbily.

Reminder – Daylight Savings

Reminder to all players, that Australian Daylight Savings time has ended. What does this mean for you?

Basically, Sydney/Melbourne/Brisbane are in the same timezone once again (huzzah!). Perth/Malaysia are 2 hours behind this time, and New Zealand is 2 hours ahead of this time. We will post Server Time (PST) when we have a chance today, but from memory its 18 hours behind.

All raid times will continue to be listed in Sydney time, which is officially AEST.

We will adjust the timechart over the coming few days.

Nefarian – Dead.

Nefarian has been slayed by Strangely Ironic (and our mish-mash of Geek Legion groupies):

You can view the bigger version here.

Awesome effort to all who attended, all who’ve assisted in the past and the friends who’ve egged us on.

Well done guys!

The day before, we cleansed MC in a record 2h37m – so grats on that also!

March Guild Update

Well, while we have been busy trying to organise how to fit in all the raids into our schedule, the guildies have been trying to devise methods to automate our jobs more:

And we’ve been working really really hard on making our complex strategies simple to ensure less wipes:

Raiding has been really fun. Especially when when Fidi found out that they had a real life snake in their house:

Congratulations to ZG2 killing Hakkar for the first time.
And Congratulations to AQ20 for killing Ossirian last week ๐Ÿ˜€

Class Preference Loot Table – Black Wing Lair

As some classes can better use an item than others, a class locking system has been implemented.

There will be open bid on items until they reach a 500 DKP value. Once they reach the 500 DKP value, then it is class preference locked.

If none of the attendees from the class preference lock wish to bid on the items (or they already have the item), then it is once again open to those classes that can use it.

Item Class Locked (Preference given) >500DKP
Angelista’s Grasp (Waist) Mage, Warlock
Archimtiros’ Ring of Reckoning (Finger) Warrior
Ashjre’thul, Crossbow of Smiting (Bow) Hunter
Ashkandi, Greatsword of the Brotherhood (2H Sword) Paladin, Warrior
Band of Dark Dominion (Finger) Warlock
Band of Forced Concentration (Finger) Mage, Warlock
Black Ash Robe (Chest) Mage, Priest, Warlock
Black Brood Pauldrons (Shoulder) Hunter, Paladin
Boots of Pure Thought (Feet) Priest
Boots of the Shadow Flame (Feet) Rogue
Bracers of Arcane Accuracy (Wrist) Mage, Warlock
Chromatic Boots (Feet) Warrior
Chromatically Tempered Sword (1H Sword) Rogue
Circle of Applied Force (Finger) Hunter, Rogue
Claw of Chromaggus (Dagger) Mage, Warlock
Claw of the Black Drake (Fist) Rogue, Warrior
Cloak of Draconic Might (Back) Paladin, Warrior
Cloak of Firemaw (Back) Hunter, Rogue
Cloak of the Brood Lord (Back) Mage, Warlock
Crul’shorukh, Edge of Chaos (1H Axe) Warrior
Doom’s Edge (1H Axe) Hunter
Draconic Avenger (2H Axe) Paladin, Warrior
Draconic Maul (2H Mace) Druid, Paladin, Warrior
Dragon’s Touch (Wand) Mage, Warlock
Dragonbreath Hand Cannon (Gun) Hunter
Dragonfang Blade (Dagger) Rogue
Drake Fang Talisman (Trinket) Hunter, Rogue
Drake Talon Cleaver (2H Axe) Warrior
Drake Talon Pauldrons (Shoulder) Warrior
Ebony Flame Gloves (Hands) Warlock
Elementium Reinforced Bulwark (Shield) Warrior
Elementium Threaded Cloak (Back) Warrior
Emberweave Leggings (Legs) Hunter
Empowered Leggings (Legs) Priest
Essence Gatherer (Wand) Priest
Firemaw’s Clutch (Waist) Mage, Priest, Warlock
Girdle of the Fallen Crusader (Waist) Paladin
Gloves of Rapid Evolution (Hands) Priest
Heartstriker (Bow) Hunter
Helm of Endless Rage (Head) Warrior
Herald of Woe (2H Mace) Druid, Paladin
Interlaced Shadow Jerkin (Chest) Rogue
Legguards of the Fallen Crusader (Legs) Paladin
Lok’amir il Romathis (1H Mace) Druid, Paladin, Priest
Maladath, Runed Blade of the Black Flight (1H Sword) Rogue, Warrior
Malfurion’s Blessed Bulwark (Chest) Druid, Rogue
Mantle of the Blackwing Cabal (Shoulder) Mage, Warlock
Mish’undare, Circlet of the Mind Flayer (Head) Mage, Warlock
Neltharion’s Tear (Trinket) Mage, Warlock
Pendant of the Fallen Dragon (Neck) Druid, Priest
Primalist’s Linked Legguards (Legs) Hunter, Paladin
Primalist’s Linked Waistguard (Waist) Hunter
Prestor’s Talisman of Connivery (Neck) Hunter, Rogue
Pure Elementium Band (Finger) Druid, Priest
Red Dragonscale Protector (Shield) Paladin
Rejuvenating Gem (Trinket) Druid, Priest
Ring of Blackrock (Finger) Druid, Paladin, Priest
Ringo’s Blizzard Boots (Feet) Mage
Shadow Wing Focus Staff (Staff) Druid, Mage, Warlock
Shimmering Geta (Feet) Priest
Shroud of Pure Thought (Back) Druid, Paladin, Priest
Spineshatter (1H Mace) Warrior
Staff of the Shadow Flame (Staff) Mage, Warlock
Styleen’s Impeding Scarab (Trinket) Warrior
Taut Dragonhide Belt (Waist) Rogue
Taut Dragonhide Gloves (Hands) Druid
Taut Dragonhide Shoulderpads (Shoulder) Rogue
The Untamed Blade (2H Sword) Paladin, Warrior
Therazane’s Link (Waist) Hunter

ZG Boss ,2 – High Priest Venoxis

What does High Priest Venoxis do?

Stage 1

  • Holy Nova – Does AOE holy damage to those around them.
  • Holy Fire – Holy damage targeted at the person with aggro.
  • Renew – Casts renew on himself. This can be dispelled by a priest.
  • Holy Wrath – A spell which jumps from person to person with damage increasing exponentially.

Stage 2 (50%)

  • Poison Cloud – Creates a poison cloud around him that does damage to anyone in the vicinity.
  • Parasites – Parasites spawn, and if they reach their intended victim, the victim is infected and loses health very quickly. These parasites can be killed easily via AOE or melee.

Positioning & Pull

  • The OT pulls Venoxis with his four adds.
  • The MT then engages Venoxis, while the OT pulls the adds to the raid.
  • The adds are then AOE’d until they are all dead.

The Fight

Stage 1

  • The OT pulls the adds, with the MT tanking Venoxis.
  • The adds are AOE’d until they are dead. Once the adds are dead, all dps on Venoxis.
  • The raid must either stand within melee range, or at full range of Venoxis. If they stand midway, the Holy Wrath spell which jumps from person to person will be activated.
  • Dispell magic is cast on Venoxis and when he casts Renew on himself, the priests will dispell this renew.
  • At 50% he will transform into a snake.
  • No mana drain is needed on this boss.

Stage 2

  • Venoxis will change into a snake, and create a poison cloud around him.
  • All melee move out and change to ranged DPS.
  • Mages are in charge of AOE the parasites that spawn and infect people they target.

From a class point of view

Druids
  • Heal the MT, then your party then the raid.
Hunters
  • DPS.
Mages
  • AOE the adds.
  • Stage 1: Cast detect magic on the boss. DPS the boss.
  • Stage 2: AOE the parasites that spawn. DPS the boss.
Paladins
  • Heal the MT, your group and then the raid.
  • Stage 2: Cleanse the MT of the poison.
Priests
  • Heal the MT, your group and then the raid.
  • Stage 1: Dispell Renew when Venoxis casts it on himself.
Rogues
  • Stage 1: DPS.
  • Stage 2: Ranged DPS.
Warlocks
  • DPS.
Warriors
  • Stage 1: DPS.
  • Stage 2: Ranged DPS. (If you are not the MT.)

ZG Boss ,8 – Edge of Madness

Edge of Madness

The Summonable bosses in Edge of Madness drop items needed for your class trinket from Zul Gurub. There are 4 summonable bosses, and they are rotated every 2 weeks. You can determine which boss is currently available to kill by reading the tablets on the far wall. It will say that they reside at the Edge of Madness if they are available.

Gri’Lek

  • Melee Damage – He is tankable when not in his Beserker Rage.
  • Beserker – His size doubles and his attacks increase dramatically (5,000 damage hit on average). His movement in this form is dramatically slowed. In this form, he will choose one player as his target and chase that player only.
  • Tremor Ability – Causes stun and root effects in an area around him. This is dispellable.

The Fight

  • The MT tanks Gri’Lek as normal.
  • When he goes into his Beserker Rage, he will target one person. That person should be as far away from Gri’Lek as possible, as Gri’Lek’s movement is slowed dramatically when in this form. He is not tankable in this form, so everyone must move away from him.
  • He will stun and root those around him, so it needs to be a ranged fight. And Paladins need to dispell roots from those who get rooted to ensure they do not get caught in his Beserker Rage.
  • Other than when he is in Beserker Rage, it is DPS as usual.
  • Do not move onto the Log in the area – as this will cause an Evade bug and his health will regenerate to 100%.

Hazza’rah

  • Spawn Giant Horrors – These spawns are visions that Hazza’rah spawns. They hit very hard, but have about 500hp, so can be killed very quickly.
  • Random AOE Sleep – Hazza’rah has an AOE sleep that puts everyone into a sleep. If this is combined with the Giant Horrors, a lot of the raid can die very quickly.
  • Mana Burn – Mana burns casters around him.

The Fight

  • The MT tanks as normal.
  • All ranged dps should be on the spawns (Multishot is great here, as is Fireblast). The spawns must be killed as soon as they appear.
  • Casters move out of the area as soon as possible.

Renataki

  • Vanish – Renataki is a rogue, and will vanish periodically and then randomly appear and ambush someone to do a bit of damage.

The Fight

  • The MT tanks as usual. A rogue can even tank him.
  • DPS him down.

Woosholay

  • Poison Cloud – Has a poison cloud around him, so melee need to keep their distance.
  • Hurricane – Nature damage AOE spell that affects those in the vicinity.
  • Lightnening Strikes – Targets people in front of him to get struck by lightening.

The Fight

  • The MT tanks. Keep him tanked facing away from the raid.
  • Melee must keep their distance.
  • If you are caught in the Hurricane, move as soon as possible.

ZG Boss ,10 – Hakkar the Soulflayer

What does Hakkar the Soulflayer do?

It is recommended that all the Priests in Zul Gurub must be killed before you attempt Hakkar. If they are not, they grant Hakkar their various abilities.

  • Mind Control Hakkar will periodically Mind Control the person who has aggro.
  • Life Tap – Every 90 seconds Hakkar uses his lifetap / bloodtap on everyone. If you have the poison from the Son of Hakkar on you, this will drain life from Hakkar. If you do not, Hakkar will gain life from each person he drains.
  • Enrage – 10 minutes into the battle, Hakkar will enter an enraged mode where he does a lot more damage. It is wise to kill him within 10 minutes.

Positioning & Pull

  • The raid stands back on the wooden platform.
  • The MT runs into Hakkar and tanks him where he stands. The 2nd MT then runs up to OT Hakkar, in preparation from when the MT gets Mind Controlled.

The Fight

  • The MT tanks Hakkar. The OT tanks Hakkar and steps in to MT when the MT becomes Mind Controlled.
  • Mages sheep the person who is Mind Controlled.
  • Once Mind Control finishes, the MT must be dispelled (once they have reached full health).
  • Hunters pull the Sons of Hakkar up to the top of the platform, and the raid kills them every 90 seconds. Everyone (except the MT) must get poisoned by the Son of Hakkar.
  • DPS must continue on Hakkar throughout the fight to ensure he is killed before the 10 minute timer. Otherwise he enrages and hits harder.

From a class point of view

Druids
  • Heal the MT, then your party then the raid.
Hunters
  • DPS Hakkar and the Sons as needed.
  • Pull the Sons of Hakkar to the platform 30 seconds before the Lifetap.
Mages
  • DPS Hakkar and the Sons as needed.
  • Polymorph the Mind Controlled Warrior.
Paladins
  • Heal the MT, your group and then the raid.
  • Dispell the Polymorphed warrior once they reach full health.
Priests
  • Heal the MT, your group and then the raid.
  • Dispell the Polymorphed warrior once they reach full health.
Rogues
  • DPS Hakkar and the Sons as needed.
Warlocks
  • DPS Hakkar and the Sons as needed.
Warriors
  • DPS Hakkar and the Sons as needed.
  • An MT and OT will be assigned to tank Hakkar.

ZG Boss ,1 – High Priestess Jeklik

What does High Priestess Jeklik do?

Stage 1

  • AOE Silence – this also does damage. It can be avoided if you are a certain disctance away from her.
  • Random Charge – she performs a random charge at raid members and knocks them over.
  • Summon Bats – Every minute she summons bats to periodically attack the raid.

Stage 2 (50%)

  • Shadow Word: Pain – Casts Shadow Word: Pain on people.
  • Mindflay – Has mindflay that affects 2-3 people in the raid simultaneously.
  • Greater Heal – Heals herself for 20-30% health at any one time.
  • Bomb Bats – Summons bats which drop fire bombs on the ground

Positioning & Pull

  • The MT pulls, with the raid group standing together at a distance from the MT.
  • The MT sunders Jeklik at least 2-3 times, and then the raid can start DPS.

The Fight

Stage 1

  • Apply as much DPS as possible, except for the casters.
  • Mages need to conserve mana and AOE the bats as they are summoned.
  • There is no need to drain mana in this fight.

Stage 2

  • Dispell Shadow Word: Pain as it gets put on people.
  • When she casts Greater Heal on herself, shield bash, kick or counterspell her. Even though it says she’s immune it will stop her healing.
  • Run out of the bat bombs as soon as possible. They have a greater range for damage than they appear to.

From a class point of view

Druids
  • Heal the MT, then your party then the raid.
Hunters
  • DPS.
  • Stage 2: Run out of the bat bombs if you are in the middle of it.
Mages
  • DPS.
  • Stage 1: Kill the bats as soon as possible with AOE.
  • Stage 2: Cast counterspell on Jeklik when she’s casting a heal.
Paladins
  • Heal the MT, your group and then the raid.
Priests
  • Heal the MT, your group and then the raid.
Rogues
  • DPS.
  • Stage 2: Run out of the bat bombs if you are in the middle of it.
  • Stage 2: Kick her when she is casting a heal.
Warlocks
  • DPS.
  • Stage 1: AOE the bats.
  • Stage 2: Run out of the bat bombs if you are in the middle of it.
Warriors
  • DPS.
  • Stage 2: Run out of the bat bombs if you are in the middle of it.
  • Stage 2: Shield bash her when she is casting a heal.

MC Boss ,9 – Majordomo

What does Majordomo do?

  • Purple Shield (Melee attacks reflected) – Lasts for 10 seconds. While this shield is up, 100 melee damage per hit reflects back to those inflicting it.
  • White Shield (Magic attacks reflected) – Lasts for 10 seconds. While this shield is up, each magic attack has a 50% chance to reflect back to the attacker.
  • Teleport – Majordomo will randomly target a player and teleport them into the fiery pit in the middle of the landing.
  • Shadowbolt – A random player will get hit by a 1,000-2,000 shadowbolt.
  • Blast Wave – An area of effect flame attack which hits nearby players with moderate fire damage.

Healer Abilities

  • Shields – Same as Majordomo.
  • Shadowbolt – Same as Majordomo.
  • Healing – Provides healing to themselves or other adds if given the opportunity to heal.
  • Polymorph Immunity – When there are 4 or less Adds alive, the healers become immune to Polymorph.

Elite Abilities

  • Shields – Same as Majordomo.
  • Blast Wave – Same as Majordomo.
  • Increased Attack – When there are 4 or less Adds alive, the Elites become enrages and increase their attack damage on their target.

Positioning & Pull

  • A Paladin pulls the group, and then bubbles. Hunters assigned to Elites will pull the Elites to their respective tanks.
  • Mages are assigned to each of the 4 adds, and polymorph these adds and keep them polymorphed until they are killed, or become immune to polymorph.
  • The Adds and Majordomo are tanked separately, to ensure the AOE Blast Wave does not stack on the tanks.
  • DPS is on the ramp – and the Adds are pulled to the Ramp. Once the 3 Elites are to be damaged to 30%, the raid then moves to the Elites.

The Fight

  • Majordomo is not killed. He is defeated by killing all 8 of his Adds. Once all the guards are killed, Majordomo will submit and give you his chest.
  • Majordomo is tanked by a Warrior, with a Paladin and Hunter. Majordomo will randomly target players and run off to melee them. The Hunter will use Distracting Shot to bring Majordomo back to the MT.
  • Mages will sheep the Healer adds and keep them sheeped (continue to sheep every time the Magic Reflection shield is down).
  • Warriors will tank the Elites.
  • Our Strategy is 1-2-3-2
    • Kill 1 Elite.
    • Kill 2 Healers.
    • Damage 3 Elites individually until they reach 20%. Bring the 3 Elites together, and AOE them so they all die at the same time.
    • The 2 remaining healers will then pop out of Polymorph. The tanks can then tank these Adds, while they are killed one by one.
  • Melee must use Shield bash and Kicks to ensure the Healers do not heal them self.

From a class point of view

Druids
  • Heal the Warrior in your group. Co-ordinate with the other Healers depending on the heals they will be using.
  • Keep HoTs on your Warrior.
Hunters
  • DPS. Follow the MA.
  • One Hunter will be in Group 1. You must use Distracting Shot to pull Majordomo back to the MT any time he strays onto another player.
Mages
  • 4 Mages will be assigned to Polymorph the Healer adds. Ensure Polymorph is cast every time the magic reflect shield is down. This prevents the Healers popping out of Polymorph and attacking other players (or you) while the Shield is activated.
  • If you Polymorph while the Magic Reflect Shield is activated, there is a high chance you will be turned into a sheep.
  • DPS. Follow the MA.
Paladins
  • Heal the warrior in your group.
  • Heal the Raid.

Buffs

  • Aura should be Fire Resist.
Priests
  • Heal the Warrior in your group.

Buffs

  • Shadow protection.
Rogues
  • DPS. Follow the MA.
  • Use Kick on the Healers to ensure they do not heal themselves.
Warlocks
  • DPS. Follow the MA.
Warriors
  • Each of the tanks will be assigned an Elite add or Majordomo.
  • Ensure that you tank the adds away from each other – as they have an AOE blast wave affect, that when stacked can become nasty.

February Guild Update – Warning Long Post Ahead

Wanted: Knightswift!!

After receiving the Eye of Sulfuras, this dwarf:

promptly left the guild. Here’s proof!

However, he forgot the guild was broken and couldn’t get back in for 3 days!! Luckily we were able to entice him back into SI again when the guild was repaired.

We would all like to congratulate Knightswift on receiving the [color=orange”>Sulfuras, Hand of Ragnaros[/color”>

BWL Update

BWL has been great fun – if not a lot of long nights. We have been really motivated to get continue through BWL.

Last week, we faced Chromaggus, who caused some problems for the tanks:

However, this week, he proved no match for us. Congratulations everyone on taking down the ugly dog! (Including those who weren’t able to make it)

Which then gave us our first glimpse of what lies beyond… Nefarian.

Also, a short movie has been made of our first encounter with Nefarian.
SI’s First Look at Nefarian
Size: 11.5mb
Duration: 1min
Encoding: Divx

Broodlord, Firemaw – Down.

Well, in the past week Broodlord Lashlayer and Firemaw were taken down. We kinda forgot to take the
Firemaw photo, but here’s a belated shot of Broodlord. Kinda bad quality, he’s not a very
photogenic boss.

Onwards to Ebonroc, Flamegor and the gigantic puppy!

We also had some attempts at Emeriss with Risen and Hush. Didn’t turn out so well; they are definitely no
magic mushrooms.

Vaelstrasz, Dead.

After some information gathering attempts the previous day to learn the encounter
(with kudos to the kiwis who had an early flight the next morning), we set foot
into BWL today to take down Vaelstrasz.

A couple of 1% wipes had us screaming in anguish, not to mention the sheer cost
of this encounter – Vaelstrasz departed the astral plane today. Click on the image for the full size version.

Monumental effort from everybody, including the tanks who walked into a storm
in a teacup with this encounter.

Well done.

After our BWL success, we went and cleared MC. The timer for this:

[size=24″>3:40:11[/size”>

MC Boss , 4 – Garr

What does Garr do?

  • Garr is a rock elemental that has 8 guards that protect him.
  • Antimagic Pulse – Garr casts an area of effect pulse that removes buffs from players in the area. This does not include potions.
  • Magma Shackles – An area of effect that slows players, reducing their movement to 40%.
  • Guard Detonation – Whenever one of Garrs adds dies, they cause an area effect explosion. Melee must move out of the explosion range when the guards are about to explode. At any time, Garr can cause his guards to explode, doing an area of effect damage to any player in the vicinity of that guard.
  • Combat boost – Whenever one of Garrs guards die, he receives a permanent boost to his damage and attack speed. If all of his guards die, the combined boost is significant to cause problems in dealing with him.

Group Setup

  • Usual group setup.
  • The 8 guards must be crowd controlled with warlocks and warriors.
  • Each warrior needs a dedicated healer in their group.

Positioning & Pull

  • The adds are assigned to each of the warriors and warlocks by using hunters marks, and priest mind vision.
  • Two hunters are then assigned to pull – one on the guards, pulling them to the left and one on Garr, pulling him to the right.
  • The guards are tanked by the warriors (and banished by the warlocks) away from Garr. This is to prevent the guards from blowing up the MT.

The Fight

  • Each of the warriors guards are taken down one by one.
  • Once all the unbanished guards have been killed, the group turns to kill Garr, leaving the remaining guards banished.
  • Tanks should be constantly on the banished guards, so warlocks may re-banish them with minimal delay to prevent Garr from blowing them up.
  • Garr will continue shackling players to prevent movement, and removing buffs – however this must be ignored and full DPS on Garr is continued until he is dead.
  • Watch when you cast spells such as Renew, Rejuvenation, Evocation and Innervate – as Garr removes these buffs as well.
  • Once Garr is dead, you must then kill the remaining guards one by one.

From a class point of view

Druids

Group 1

  • Druids should be healing the MT and then their group.
  • Provide innervates to the priests as assigned, watch for cleansing of buffs by Garr, and do this in between.

Group 2-8:

  • Heal your warrior.
  • Once the guards are down, move up and help heal the MT.
Hunters
  • Guard Selection : All Hunters must mark a separate add. Ensure that you mark adjacent guards. And keep your Hunters Mark on them at all times.
  • Hunters are part of the DPS group. Follow the MA.

Group 3:

  • Peel the guards to the warriors.

Group 4:

  • Use distracting shot to peel Garr to the MT.
Mages
  • Mages are part of the DPS group. Follow the MA.
Paladins

Group 1:

  • Heal the MT.

Group 3-8:

  • Keep your party healed.
  • Cleanse the MA.

Buffs:

  • Devotion auro should be on.
Priests

Group 1:

  • Heal the MT.

Group 2-8:

  • Heal your warrior / warlock.
  • Once the adds are down, move up and help heal the MT and then your party.

Buffs:

  • All buffs should be given to all players.
Rogues
  • Rogues are part of the DPS group. Follow the MA.
Warlocks
  • Warlocks are assigned targets.
  • Continual banish on the guards are needed.
Warriors

Group 1:

  • Group 1 warrior is the MT.

Group 3-8:

  • You will be assigned guards to tank.
  • Once these guards have been killed, a warrior must then tank the banished adds.
  • The rest of the warriors then turn to DPS. Follow the MA.

Guild Update

Time for a guild update I reckon. In recent news, our second MC group has downed Ragnaros on their first serious
attempt! Of course, there were some wipes on the previous run including a heartbreaking SI famous
1% wipe on the first attempt of the night, but we got him the second attempt.

We also hit our straps in BWL, and downed the ever-present Razorgore! We’d hit some scheduling problems
in weeks previously, and once we found a good timeslot we were able to give it a
good bash. Kudos go out to Blizzard for making the instance so good,
good enough that it drops one of our rogues every single time we attend.

2005 has been and gone. WoW had some festivities on New Years Eve culminating in some very poor fireworks.
Apparrently, they were about as poor as the ones for Independence Day.

We also went out to Silithus on the weekend on the back of some rep farming by Psychotic and Tabion.
We killed some bosses such as this guy:

Unfortunately, out of two days we killed the same boss…SIX times! We also ran across a PvP’d horde
who was a loonnnnggg way from home:

Christmas has also been and gone. 1 year of Warcraft, and a reflection on where
we have all come from to get to where we are in the game today. At times throughout
Azeroth, we run into the enemy, even if they’re strangely familiar (in this case)
Sander, from Strangely Hordish:

Strange times can happen indeed when playing with guild tabbards:

Lots of reindeers in Ironforge:

and the Christmas SI 2005 photo: