MC Boss , 1 – Lucifron

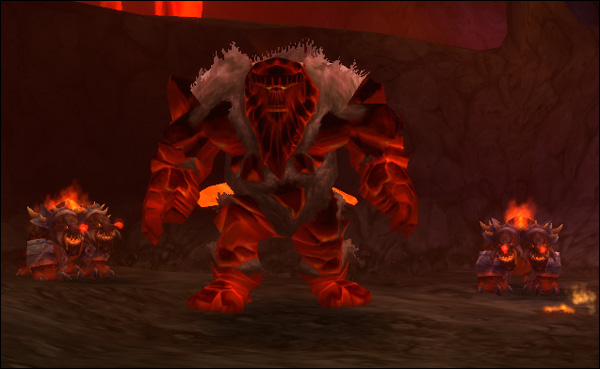
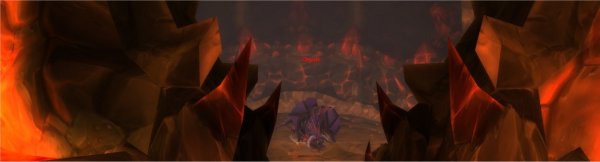
What does Lucifron do?

  • Melee attack – Lucifron does a melee attack.
  • Mind Control (Magic) – Lucifron can select a raid member and mind control them to attack other raid members.
  • Impending Doom (Magic) – 2000 health damage spell. Cleansable by Paladins and Priests.
  • Lucifron’s Curse (Curse) – 100% mana expend increased. Decurseable by Mages and Druids.
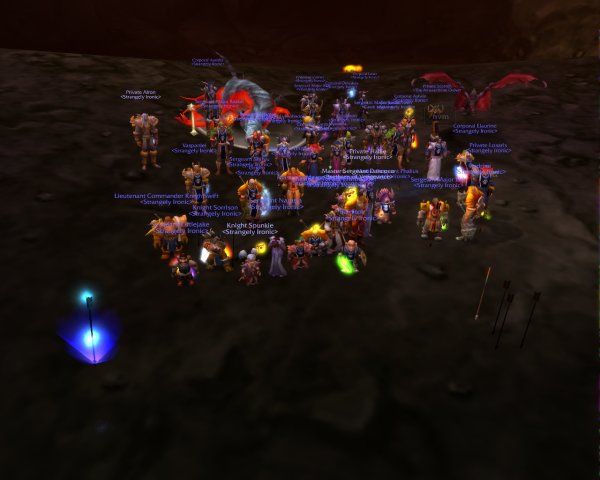
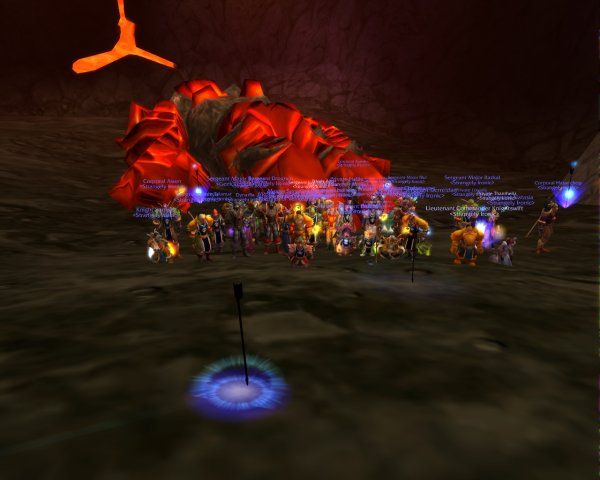
Positioning & Pull

  • Group 1 & 2 are positioned up near the pylons. Group 1 & 2 act as their own separate unit tanking Lucifron until the adds are killed, and the rest of the raid join them.
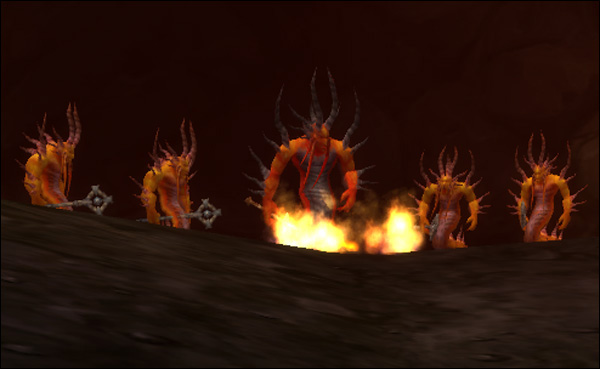
  • Group 3 & 4 are to the left, with one of the adds marked with a Hunters Mark.
  • The MT2 engages Lucifron, and is usually mind controlled. The Priests / Paladins must be fast in dispelling the mind control. The MT then steps in and tanks Lucifron.
  • Group 3 & 4 Hunters pull the adds with distracting shots to the relevant warriors in the group. The adds are then moved south towards the rest of the raid.
  • Group 3-8 remain at the back of the cave to take down the Adds.
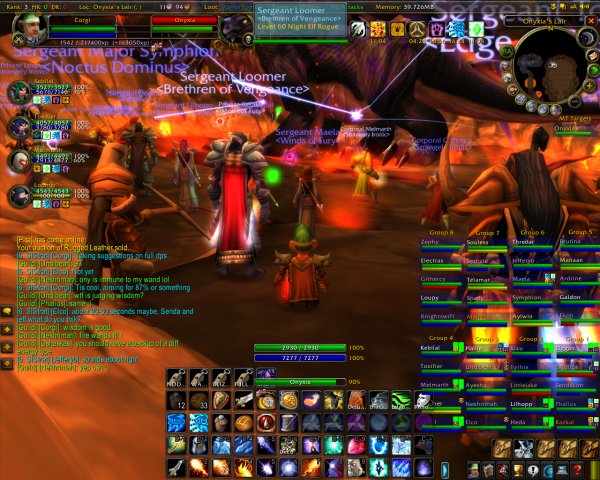
The Fight

  • The MT tanks Lucifron out of LOS of the rest of the raid, to the right near the wall. This protects the rest of the raid against the magic and curses while the rest of the raid kill the two adds.
  • The MA will select an add, and the group will take down that add.
  • When complete, move immediately onto the second add.
  • Mages and Paladins should decurse/cleanse when required, although the range should minimise Lucifron’s issues.
  • Mind Control is an issue during this phase. Priests pay extra attention to those who are in red and cleanse them immediately.
  • When both adds are down, G3-8 join G1 & 2 and take Lucifron down. As a rule of thumb, if you crit – do not attack for 3 seconds (especially rogues). Do not steal the aggro from the MT!
  • Mages/Paladins cleanse/decurse constantly during this phase. Decursive will help, but learn to go without it.
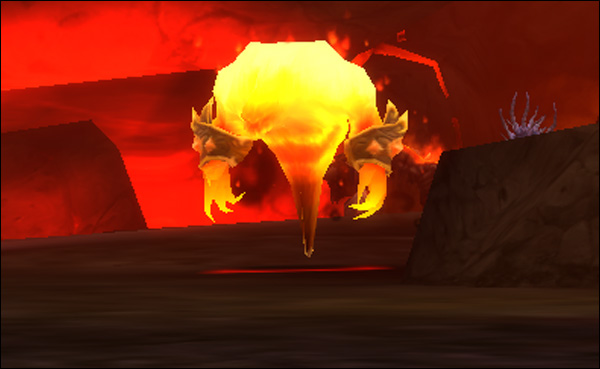
  • All raid members must stay away from the imp cave on the left.
  • Mages, Priests and Paladins must first decurse/demagic their own group. They must then continue this for the rest of the groups that do not have the classes need to cleanse them. It’s best to determine a group you are going to cleanse before the raid begins.

From a class point of view

Druids

Group 1 & 2:

  • Druids should be healing the MT and then their group.
  • Provide innervates to the priests as assigned.
  • If for any reason the MT goes down, the druids must be quick to react and heal the MT2.

Group 3-8:

  • Heal your party.
  • Once the adds are down, move up and help heal the MT.
  • If needed, help the mages decurse when necessary.
Hunters
  • Hunters are part of the DPS group. Follow the MA.

Group 3:

  • Mark one of the adds with the Hunters Mark.
  • Peel this add with distracting shot to your warrior, once the MT2 has pulled.

Group 4:

  • You are on the add without the Hunters Mark.
  • Peel this add with distracting shot to your warrior, once the MT2 has pulled.
Mages

Group 1 & 2:

  • Mages should ensure they decurse their party. Healers are a priority here.

Group 3-8:

  • DPS on the adds.
  • Once the adds are killed, and you move up to the main group, you must take on a decursing role. Decurse the healers first, then other members of your group, then other groups if needed.
Paladins

Group 1 & 2:

  • You should be solely cleansing your group.
  • If the MT looks like he is in trouble, and there is no cleansing needed, please heal the MT or other members in your party.

Group 3-8:

  • Keep your party healed.
  • Cleanse your party where necessary.

Buffs:

  • Devotion auro should be on.
  • Ensure your group is buffed with Shadow Protection from a priest.
Priests

Group 1 & 2:

  • Ensure your group is buffed with Shadow Protection (and any other groups that don’t have a priest).
  • Heal the MT.
  • Cleanse Mind Control if needed (especially on the pull).

Group 3-8:

  • Cleanse Mind Control if needed.
  • Heal your party.
  • Once the adds are down, move up and help heal the MT and then your party.
  • If needed, help the paladins cleanse magic when needed.

Buffs:

  • Shadow Protection is needed for the entire raid.
Rogues
  • Rogues are part of the DPS group. Follow the MA.
Warlocks
  • Warlocks are part of the DPS group. Follow the MA.
Warriors

Group 1 & 2:

  • Group 1 warrior is the MT. Group 2 warrior is the backup MT2. If for any reason the MT goes down, the MT2 must immediately move in.
  • The MT2 pulls Lucifron to the MT.

Group 3:

  • You are tanking the add with the Hunters Mark.
  • Once the add has been pulled to you, take the add down the back of the cave.
  • This add will be killed second.

Group 4:

  • You are tanking the add without the Hunters Mark.
  • Once the add has been pulled to you, take the add down the back of the cave.
  • This add will be killed first.

Group 5-8:

  • You are on DPS. Follow the MA.

MC Boss , 8 – Sulfuron Harbringer

What does Sulfuron do?

  • Melee Effect – Sulfuron does melee damage to the MT.
  • Fire AOE Effect – Sulfuron has an AOE effect, that casts damage to those around him.
  • Adds – Sulfuron comes with four priest adds. These adds must be separated one by one from the group, and killed, otherwise they heal one another. Once all adds are killed Sulfuron will hit with more force.
  • Add Debuffs – Sulfuron’s Adds hit raid members with 1-2 debuffs (at the same time) that cause a lot of damage. Priests must dispell these debuffs, first off their OT warriors, then themselves, then the pallies who are healing the warriors.

Positioning & Pull

  • A pally pulls Sulfuron to the MT.
  • Hunters peal off the adds to 4 OTs.
  • The rest of the raid stays up the hill. One by one, the adds are pulled up the hill and killed by the raid.
  • A pally, priest and MT/OT from each group remains at the bottom of the hill near the platform until their add is killed. Once 3 adds are killed, the raid moves down to the bottom of the ramp to kill the final add and then Sulfuron.

The Fight

  • The MT will tank Sulfuron until all the adds are killed one by one.
  • The adds are moved up the hill to be killed by the rest of the raid. The next add is not moved into position until the targeted add is down, otherwise the adds heal each other.
  • Priests will be dispelling their warriors, during this fight, with druids and pallies healing. The reason for this is because priests can remove two debuffs at once, while pallies can only remove one. This is important as Sulfuron’s Adds have nasty debuffs that can be applied 2 at a time to all party members.
  • Once all adds are down, all raid members move onto kill Sulfuron.

From a class point of view

Druids
  • Druids should be healing the MT or the OT’s depending on which warrior is in their group.
  • Heal the raid if you are not in a group with an MT or OT.
  • Provide innervates to the priests who are in the group with the OTs. Innervates will be assigned.
Hunters
  • Hunters are part of the DPS group.
Mages
  • Mages are part of the DPS group.
Paladins
  • Should have Devotion Aura up.
  • You are on main healing duty to heal the OT in your group.
  • There will be approximately 1 out of combat rezzer assigned. Healers and then casters get priority on rezzing when needed.
Priests
  • Priests are the main dispellers for this fight. Keep dispelling your warrior, yourself and your pally.
  • If you are in a group where the add has been killed, you are dispelling the rest of the raid.
Rogues
  • Rogues are part of the DPS group.
  • Rogues should use their poisons – specifically mind-numbing poison and wound poison to increase add casting time and reduce the effect of their healing.
  • Once the adds drop below 50% health, the rogues should chain kick the adds to interrupt their self-heals.
Warlocks
  • Warlocks are part of the DPS group.
Warriors
  • If you are not MT or OT assigned, you will be on DPS.
  • If you are an OT, ensure your add is brought to the rest of the raid when needed. Do not allow your add to move otherwise.

MC Boss ,7 – Golemagg

What does Golemagg do?

  • Stomp Effect – Golemagg has a stomp effect that damages those within melee distance of him.
  • Adds – Golemagg has two dog adds that need to be tanked. If you kill the adds, they will respawn, so they are just off tanked until Golemagg is killed. They then die as well.
  • Increased damage at 10% – At 10% Golemagg will increase his stomp damage. At this point, the MT holds him until ranged take him out.

Positioning & Pull

  • A pally pulls Golemagg to the MT, and the adds are then pealed off to the two off tank warriors.
  • The main raid stays in the middle of the room.

The Fight

  • After a pally pulls Golemagg to the MT, the adds are then pealed away from Golemagg and tanked by two off tahnks.
  • Full DPS is called after the MT has established aggro.
  • All DPS on Golemagg. The adds are just held in position.

From a class point of view

Druids
  • Druids should be healing the MT or the OT’s depends which warrior is in their group.
  • Heal the raid if you are not in a group with an MT or OT.
  • Provide innervates to the priests who are in the group with the OTs. Innervates will be assigned.
Hunters
  • Hunters are part of the DPS group.
Mages
  • Mages are part of the DPS group.
Paladins
  • Should have Devotion Aura up.
  • You will also need to heal the MT or OT in your group and the rest of your party.
  • There will be approximately 1 out of combat rezzer assigned. Healers and then casters get priority on rezzing when needed.
Priests
  • Healer rotations will be assigned for the MT.
  • If you are in an OT’s group, you are main healer for that OT. Please call for Innervates when you need them.
  • If you are not in a group with the MT / OT or assigned a healing rotation, please ensure you heal the MT and OTs depending whichever health is falling faster.
Rogues
  • Rogues are part of the DPS group.
  • Once 10% is called, please move out of stomp range.
Warlocks
  • Warlocks are part of the DPS group.
Warriors
  • If you are not MT, you will be on DPS on Golemagg.
  • Once 10% is called, please move out of stomp range.

MC Boss , 5 – Baron Geddon

What does Baron Geddon do?

  • Flame Melee – the flame based melee attack is fairly weak.
  • Point blank area affect (PBAOE) – this is a pulsing effect that increases the damage to you the longer you are in it. The first pulse hits for about 200, the last for over 2000. It looks like a warlock doing hellfire.
  • Ignite Mana (Magic) – a debuff that is cast on players that will remove 400 mana and 400 life per tick so long as the person with the debuff has mana. This effect is useless on rogues and warriors but must be dispelled on everyone else immediately. It can be dispelled by Paladins or Priests.
  • Living Bomb – Any player in the raid can become a living bomb. After 10 seconds, the player will explode taking 3000+ damage, and sending them airborn which will also cause a lot of damage to the player. Anyone in a radius of the explosion will also take 3000+ damage. If you have the bomb you must run towards the outer walls. This allows you to get away from the rest of the raid so you don’t kill them, and puts a ceiling over your head to minimise the fall damage. If you do not move out of the way, this has the ability to cause a wipe, as you blow up your raid party. You will know you are the bomb by the swirling affect around your body. Alerts will also pop up on your screen in raid and tells.

Positioning & Pull

  • The raid forms a big circle around the centre of Garr’s room, and Baron gets pulled into here.
  • You will be positioned according to group. Stay with your group (unless you are the bomb).
  • The MT takes up position in the centre of the room. A campfire will be setup to indicate the point.
  • A hunter pulls Baron Geddon into the room using their pet.

The Fight

  • After a hunter pulls Baron Geddon into the room, the MT engages immediately. The MT will keep Baron Geddon in the middle of the room, with the rest of the raid around him.
  • Full DPS is called after the MT has established aggro.
  • Melee can go in to damage Baron Geddon, however they must immediately move out of the way when he begins to pulsate.
  • Baron Geddon’s aggro table is reset immediately after he pulsates, so it’s important for the MT to use a ranged shot to keep Baron Geddon’s attention.
  • Pallies and (priests without pallies in their group) must dispell the Ignite Mana debuff straight away from their groups.
  • When a player has the bomb, they must run away from the group, towards the outer walls. See damage minimising techniques below.
  • When Baron Geddon hits about 5%, he will try to do a “Final server for Ragnaros” and do a high damage blast wave. The idea is to burn him down incredibly fast before he does this.
  • If/when the MT becomes the bomb, he remains in place. All melee must move away from him. Priests needs to shield the MT and cast renew. Druids must cast rejuvenate. All healers must constantly heal the MT during this period to keep him alive.

From a class point of view

Druids
  • Druids should be healing the MT as main priority.
  • Heal your group if the MT’s health is stable.
  • If you see a party member with the bomb, cast Rejuvenate on them.

Surviving the bomb:

  • Run to the outer wall. Stay away from the OOC rezzers.
  • Cast Rejuvenate on yourself.
  • Change into cat form, as this will minimise the fall damage.
Hunters
  • Hunters are part of the DPS group.

Surviving the bomb:

  • Run to the outer wall. Stay away from the OOC rezzers.
  • Hope a priest casts shield on you.
Mages
  • Mages are part of the DPS group.

Surviving the bomb:

  • Run to the outer wall. Stay away from the OOC rezzers.
  • Cast Fire Ward and Slow fall.
  • If you are a frost specced mage, you can Ice Block. This will remove the living bomb effect from you.
  • Use Cold Snap and then Ice Block if you get the bomb a second time.
Paladins
  • Should have Fire Resist Aura up.
  • Immediately dispell all mana users in your group. This is your main job.
  • You will also need to heal the MT when you are not dispelling.
  • There will be approximately 2 out of combat rezzers assigned. Healers and then casters get priority on rezzing when needed. Watch for any living bombs.

Surviving the bomb:

  • Divine shield will remove the bomb effect from you.
  • If you get it a second time, run to the outer wall, and cast Blessing of Protection on yourself. Stay away from the OOC rezzers.
Priests
  • Healing the MT is a priority for all Priests, as healers may get the bomb and be taken out of commission. If you have time, you can heal your party members.
  • Dispel Ignite mana the second you get it.
  • If you see someone with the living bomb in your party, hit them with PW:Shield and Renew.

Surviving the bomb:

  • Run to the outer wall. Stay away from the OOC rezzers.
  • Shield yourself.
  • Also cast renew onto yourself.
  • Cast levitate to avoid the fall damage.
Rogues
  • Rogues are part of the DPS group.
  • Avoid the PBAOE.

Surviving the bomb:

  • Run to the outer wall. Avoid the MT at all costs.
  • Safe fall will minize your fall damage.
Warlocks
  • Warlocks are part of the DPS group.

Surviving the bomb:

  • Run to the outer wall. Stay away from the OOC rezzers.
  • Hope a priest casts Shield on you.
Warriors
  • If you are not MT, you will be DPS.
  • Avoid the PBAOE.

Surviving the bomb:

  • Run to the outer wall. Avoid the MT at all costs.
  • Your HP alone is enough to help you survive.

MC Boss , 6 – Shazzrah

What does Shazzrah do?

  • Arcane AOE – Arcane area of effect that hits everyone in a 30 yard radius with damage.
  • Teleport – Sharrah will teleport to a random raid member and begin his AOE. The targetted member must run straight towards the center of the room, to allow the MT to regain aggro.
  • Self Buff Shield – Shazzrah has a self buff that decreases incoming damage. This can be dispelled (once detected). Mages need to cast detect magic on Shazzrah to see when he has it up, while a priest dispells for the fight. The buff looks like a Salvation icon on Shazzrah.
  • Curse – A curse is cast on players that needs to be removed by Mages or Druids. The MT needs to be dispelled immediately as it increases arcane damage.
  • Counterspell – A counterspell is cast on players at intervals that will prevent someone from casting the school of magic they were casting for 10 seconds.

Positioning & Pull

  • The raid forms a big circle around the centre of Garr’s room, and Shazzrah gets pulled into here (just like Baron).
  • You will positioned according to group. Stay with your group.
  • The MT takes up position in the centre of the room. A campfire will be setup to indicate the point.
  • A hunter pulls Shazzrah into the room using their pet.

The Fight

  • After a hunter pulls Shazzrah into the room, the MT engages immediately. The MT will keep Shazzrah in the middle of the room, with the rest of the raid around him.
  • Full DPS is called after a period of time.
  • This is a ranged fight. Melee do not go into the center area at all.
  • Mages cast detect magic on Shazzrah and keep that on him at all times. Priests then dispell the Self Buff which reduces damage.
  • Mages and druids need to decurse their group, as well as provide damage where possible.
  • When Shazzrah teleports to a random person in the raid and begins the AOE, that targeted person needs to immediately run to the middle of the room towards the MT. CTRaid will show you who Shazzrah’s target is. All raid members should have the latest version of CTRaid installed.
  • Greater Arcane Protection Potions are widely used during this fight.

From a class point of view

Druids
  • Druids should be healing the MT as main priority.
  • Heal your group if the MT’s health is stable.
Hunters
  • Hunters are part of the DPS group.
Mages
  • Mages must decurse the MT and their party as a matter of priority.
  • Detect magic must be kept on Shazzrah at all times to allow priests to see the Shazzrah’s shield.
  • Mages are part of the DPS group when there is no curse on the party.
Paladins
  • Should have Devotion Aura up.
  • You will also need to heal the MT and your party.
  • There will be approximately 2 out of combat rezzers assigned. Healers and then casters get priority on rezzing when needed. Watch out for Shazzrah teleporting to your area.
Priests
  • Healing the MT is a priority for all Priests. If you have time, you can heal your party members.
  • One assigned priest is on dispelling duty. You must keep out of range of Shazzrah’s AOE however.
Rogues
  • Rogues are part of the ranged DPS group.
  • Avoid the AOE.
Warlocks
  • Warlocks are part of the DPS group.
  • Keep the curses on Shazzrah at all times (however watch the spots given to detect magic.
Warriors
  • If you are not MT, you will be ranged DPS.
  • Avoid the AOE.

Guild Update

After weeks of hard effort by all attendees, SI has ploughed through MC this weekend with fireworks, deaths and lots of loot. This weekend heralds our first clear through to Golemagg! Every attendee this weekend should be proud of the progress we have made, and everyone from raids past should feel proud of their contribution to this boss killing machine.

Shazzrah:

Sulfuron:

Golemagg:

Our thanks officially goes out to all the guilds (BWM, PM, FD) and friends who have helped us out along the way with tactics and/or other helps. Your happiness to see us progress has been a blessing in disguise – thank you.

To the officers and members of SI as well as our friends who sat through the wipes at the start with aplomb and never once questioned the seemingly bizarre tactics we were telling you to follow, we thank you.

Above all else we’re in this as a challenge and to have fun. Here’s to many weeks of that continuing!

The Tuesday Night Games

[color=red”>CONGRATULATIONS AYLWIN[/color”> Winner of the [color=green”>Gnome Race Around the World![/color”>

The night was a great night, with Aylwinny’s route through Menthil Harbour being the quickest way to Rachet. Those of us who got stuck in STV still had a great time though! ๐Ÿ™‚

[color=maroon”>Next Tuesday Night Games[/color”>

Date: 30/08/2005
Time: 8pm AUST EST / 3am Server Time
Prize: 5g & a Lucky Door Prize

[color=green”>Event: SI Deathmatch Arena[/color”>
Every level is welcome to attend our SI Deathmatch Arena. A free for all in the STV Arena. Just because you’re not L60 doesn’t mean you can’t win!

3 rounds of Deathmatch…last man standing wins the round.
Then the 3 winners will thrash it out to find the winner!

——
If you have a suggestion for the Tuesday Night Games, please mail Hallie in game.

Guild Update

Congratulations everyone from another successful week!

Onyxia has been killed.
And we have progressed in MC – Baron Geddon is down!!

Let the celebrations begin!

Congratulations to everyone who received an epic this week. Too numerous to name, however if you check the DKP pages, you will find the answers there ๐Ÿ™‚

[align=center”>

Guild Bank Items – Given to Players

Items given to members by the Guild Bank

10/06/05 Bottom Half of Advanced Armorsmithing: Volume II to Cactusjack
23/06/05 Wildheart Belt given to Hasanchop
23/06/05 Tome of Arcane Brilliance given to Marolynn
25/06/05 Book: Gift of the Wild to Faldorn
04/07/05 Formula: Smoking Heart of the Mountain given to Balditok
04/07/05 Codex: Prayer of Fortitude II given to Aprilice
04/07/05 Bottom Half of Advanced Armorsmithing: Volume III given to Cactusjack
05/07/05 Codex: Prayer of Fortitude given to Lindal
05/07/05 Magister Belt given to Corgi
14/07/05 Pattern: Red Mageweave Gloves given to Corgi
14/07/05 Devout Belt given to Lindal
15/07/05 Pattern: Cindercloth Pants given to Aprilice
15/07/05 Pattern: Felcloth Robe given to Aprilice
15/07/05 Recipe: Greater Fire Protection Potion to Aylwin
15/07/05 Plans: Radiant Leggings given to Cheribum
15/07/05 Plans: Radiant Leggings given to Melmarth
15/07/05 Recipe: Greater Fire Protection Potion to Idreal
15/07/05 Schematic: Major Recombobulator given to Phalius
15/07/05 Pattern: Frostweave Gloves given to Aprilice
15/07/05 Pattern: Ghostweave Vest given to Aprilice
15/07/05 Schematic: Gnomish Alarm-O-Bot given to Phalius
31/07/05 Codex: Prayer of Fortitude given to Eiliah
31/07/05 Pattern: Frostweave Pants given to Razkalian
31/07/05 Beaststalker’s Bindings given to Aitan
31/07/05 Shadowcraft Bracers given to Loup
02/08/05 Dwarven Hand Canon given to Sorrison (donated by Hasanchop)
20/08/05 Devout Belt given to Oshaskas
15/08/05 Shards given to Voltage for +22 Intellect Enchant
20/08/05 Shadowcraft Belt given to Aylwin
20/08/05 Magister’s Bindings given to Nekhrimah
20/08/05 Book: Gift of the Wild given to Thanubra
20/08/05 Bracers of Valor given to Heryn
20/08/05 Top Half of Advanced Armorsmithing Volume I given to Lindal
20/08/05 Bottom Half of Advanced Armorsmithing Volume II given to Lindal
20/08/05 Top Half of Advanced Armorsmithing Volume II given to Lindal
20/08/05 Tome of Arcane Brilliance given to Samber
20/08/05 The Light and How To Swing It given to Kalmillo
20/08/05 The Light and How to Swing It given to Hayden
20/08/05 Medallion of Grand Marshal Morris given to Elco
20/08/05 Black Dragonscale Leggings given to Kirasa
25/08/05 Sword of Zeal given to Alron
25/08/05 Recipe: Flask of Chromatic Resistance given to Kaila
01/10/05 Medallion of Faith given to Psychotic
01/10/05 Beaststalker Bindings given to Aitan
05/10/05 Wildheart Gloves given to Kopl
05/10/05 Wildheart Belt given to Kopl
05/10/05 Wildheart Bracers given to Kopl
05/10/05 Book: Gift of the Wild given to Kopl
05/10/05 Book: Gift of the Wild II given to Kopl
10/10/05 Lightforge Bracers given to Erdrick
10/10/05 Book: Gift of the Wild II given to Taray
10/10/05 The Arcanists Cookbook given to Nekhrimah
10/10/05 Harnessing Shadows given to Tomminz

Please send your item donations to Olanie.
Please send your materials donations to Aprilice.

Your generosity is appreciated.

If you need an item in the guild bank – please apply for it in the Guild section of the Community Forums thread. Officers assign items based on a variety of factors, including level, need and contribution to the guild.

SI -v- Onyxia

[align=center”>

Week 1 – 8 July 2005

On the 8th of July 2005, Strangely Ironic ventured forth into Onyxia’s Lair to test their strength against the legendary dragon. For most, this would be their first journey into Onyxia. For a few, it would be their first real outing with SI as an end-game raid.

[align=center”>

After long winded typing of directions and a quick adoption of the guild to adhere to NO DPS calls, our best effort was 53%. By all accounts, it was an excellent start to our Onyxia campaign – Stage 1 where many guilds have failed before us, was a cakewalk.

Strangely, out of all else – we avoided multiple deep breaths.

Week 2 – 15 July 2005

Buoyed by our 53% attempt, we came back Week 2. The group overall felt (in terms of dps/healing) a bit weaker than the first, but nonetheless we had a few new people attend. In general, our attempt was as good as the first week – however the whelp cleanup crew stuggled a bit to keep them away from the healers. 59% or similar was our average for this week, with our first foray into the 20% Phase 3 mark with half the raid gone.

[align=center”>

Importantly, everyone remembered things from the week before and didn’t make any major mistakes.

Week 3 – 22 July 2005

We slipped a bit here. I’ve always put this one down to just one of those bad days at the office. We managed to get Onyxia into Stage 3 again, but it was literally a 38% wipe.

Week 4 – 29 July 2005

It was on this week that the majority of players felt Onyxia was achievable. Much banter was carried forth onto the forums about ways we could enhance our strategy. This was further enthused by our successes in the Molten Core.

[align=center”>

We managed to get Onyxia to 10%, despite all our efforts to try for single digits. Again, we had quite a few people dead and this effort was truly tremendous. We managed to maintain the Run ,2 Money Win, and didn’t quite recover after this.

Week 5 – 5 August 2005

In terms of success, it wasn’t there. But, the single most important thing that was taken out of this day was that we managed to get Onyxia to 40% on each run with a minimal amount of fuss. Still had some issues with the fear. Little did we know the week that was to approach.

[align=center”>

Week 6 – 12 August 2005

The weekend before we’d taken our watershed moment in beating Magmadar, Gehennas and Garr. We probably took a lot of encouragement from this into our battle with the angry dragon.

Not quite sure the percentages leading up to it, but we did have this one. Pretty heartbreaking, but boy did we know she was a sitting duck ready for the slaughter.

[align=center”>

With some afk, some reinforcements and a will to succeed, we did it!

[u”>VICTORY![/u”>

[align=center”>

[align=center”>

[align=center”>

Officially, we would like to congratulate our guildmates and associates who have achieved great things by defeating Onyxia. We pride ourselves on being a fun, casual guild with members of all types. This kill typifies that even casual guilds can have fun or die trying.

[align=center”>[size=18″>Congratulations Strangely Ironic!!![/size”>

Strategy wise, we would like to thank Pacifist/Goon Squad for providing such a well written guide to follow. Naturally, reading a webpage or watching a video doesn’t guarantee success – but we definitely based ours on the fine work by these guys. Our thanks also to guildmates and associates for refining tactics and calls for the SI Way of Lifeรขรข€žยข

The Tuesday Night Games!

From next week (23rd August 2005), we’ll be running a contest every week called the Tuesday Night Games.

Each week, we’ll have a different themed competition that most levels can compete in.

[color=maroon”>Tuesday Night Games[/color”>

Date: 23/08/2005
Time: 8pm AUST EST / 3am Server Time
Prize: 5g & a Lucky Door Prize

[color=green”>Event: Gnome Race Around the world[/color”>
Create a L1 Gnome alt (those of you who have no more room in your character lists, bring your lowest level character to the Gnome spawn location in Dun Morogh). Please note that characters above L10 will not be entered into the competition.

You must then race your Gnome from Dun Morog to Ratchet in The Barrens.

The one to reach Ratchet first is the winner.

Rules:
– No money used.
– No magical means allowed (this includes hearth, mage ports, warlock summons, engineering ports).
– You must arrive alive to win.

——
If you have a suggestion for the Tuesday Night Games, please mail Hallie in game.

Guild Update

Once again, a great run of MC this weekend guys. Sorry that it went a bit over time…however we were on fire! In the past week, we’ve had the following results:
Onyxia: DEAD
Lucifron: DEAD
Magmadar: DEAD
Gehennas: DEAD
Garr: DEAD
Geddon: 44%

Congratulations to the following people who received epics this weekend (not including Onyxia’s run):
Alron – Drillborer Disk
Ardrine – Lawbringer Gauntlets
Drognen – Nightslayer Cover
Elaurine – Heavy Dark Iron Ring
Hallie – Mana Igniting Cord
Hasanchop – Cenarion Leggings
Phalius – Felheart Pants
Raster – Aged Core Leather Gloves
Razkal – Cenarion Bracers

Special award to Cardz for the most deaths, and soloing Geddon to 44%…well done! We’ll send you in first next week ๐Ÿ˜€

Garr is DEAD!!

Congratulations everyone!! Mags, Gehen and Garr all dead for the first time in the same week!!

Grats to those who received [color=indigo”>EPIC[/color”> drops as well!!

Alron – Heavy Dark Iron Ring & Flamewaker Legplates
Daxar – Gloves of Prophecy
Idreal – Cenarion Helm
Lindal – Circlet of Prophecy
Natasia – Girdle of Prophecy
Spinn – Girdle of Prophecy
Telamar – Nightslayer Bracelets

[align=center”>
And the celebration that Garr is dead continues ๐Ÿ™‚

Onxyia Strategy

There are 3 phases in the Onyxia fight and each phase is a third of her life each as we take her down accordingly.
PHASE 1: Onyxia is on the ground attacking the main tank should have all aggro and DDโ€™ers have to control agro at this point.
PHASE 2: Onyxia will take flight and shoot fireballs at various people and waves of whelps will come out. If players are not spread out, or enough DPS is kept on Onxyia, she takes a deep breath and burns anyone in her path.
PHASE 3: Onyxia is back on the ground and the ground is spitting fire between the cracks and MT should get back agro before DDโ€™ers start attacking till she dies. Fear is cast approximately every 20 seconds.

The Phases

Phase 1:

  • The MT runs in about 20 feet ahead of everyone in the group, all others must follow quickly. Wardens spawn at the entrance to Onxyia’s cave, nobody can remain behind.
  • Odd numbered groups go to the left (NW corner) and even numbered groups go to right (NE corner).
  • The MT will always be tanking her at the north side.
  • At this point the range/casters need to be along the walls and the melee classes can line up near around the side of her body (meaning the melee are in front of the casters).
  • Listen to the Raid Leader for calls for attacks. NO DPS (MT Only), Wands Only, Full DPS (mana must be conserved on this stage). There is no rush in Phase 1. Bring Onxyia’s health down steadily.
  • There should be no welps unless someone jumps into them, or is hit by Onxyia’s tail and lands in the cave.
  • If aggro is not on the MT everyone must stop attacking.

Phase 2:

  • When she gets down to 67% health she will take flight.
  • Take a fire protection potion at this point if you have one.
  • Everyone must move and SPREAD OUT. If there are clumps of people she will fire at that group and survivability is extremely low.
  • Full DPS is called immediately. All Hunters, Mages, Warlocks and any other ranged attacks need to be carried out at this time.
  • As many DOTs should be placed on her as possible.
  • To prevent a deep breath from occurring (which kills practically everyone in its path), the whole group needs to spread out, and keep constant high DPS on Onxyia at all times in Phase 2.
  • During this time there will be waves of whelps. All warriors and paladins are on the whelps. Ensure the whelps are kept off the casters, hunters and healers. If there are too many whelps, call for Rogues to help.
  • Healers help focus healing on whelp killers and any casters that have been hit. If nobody in your group needs healing, nor in the vicinity of you, sit down and regen mana.
  • By 43%, there should be no more DOTs being placed on Onxyia. At the end of Phase 2, Onyxia wipes her aggro table, and if there are any DOTS remaining, she will come directly for the DOT giver at the beginning of Stage 3. This must be avoided at all costs.
  • Majority of the raid group if not all should be alive at this phase.

Phase 3:

  • At approximately 40% Onxyia lands. All DPS is to STOP immediately (casters to regen mana). The MT is to get aggro asap.
  • Replenish your fire protection potion at this point if you have any left.
  • Back to phase 1 positions immediately. MT will be back on the north side tanking her.
  • The cracks on the ground will now spit out fire, (AVOID being in the cracks).
  • Move back and forth constantly to limit the fear range when you are feared.
  • A small group of whelps will come out of the whelp pits. Warriors and Rogues are to deal with these whelps as soon as possible.
  • Healers MUST keep the Main Tank alive.
  • At 5% Onyxia will start hitting a lot harder and all healers must focus on the tank alone. Full DPS is called to bring Onxyia down.

From a class point of view

Druids

Phase 1: Follow the MT and split off with your group. Healing priority is given to the MT and then your group.

Phase 2: Spread out and keep your group healed. Second priority is given to whichever group you are in, odds or evens.

Phase 3: All healing on MT. Keep the MT alive, especially when Onxyia reaches 5%.

Hunters

Phase 1: Follow the MT and split off with your group. Keep up medium DPS when called. Feign often to avoid aggro.

Phase 2: Spread out. Full DPS on Onxyia. Keep all DOTs on her until 43%.

Phase 3: Stop DPS immediately when she lands. Put on Aspect of the Pack, which will help your group fight fear. Follow the DPS calls, and remember to Feign often. Aggro must be held by the MT.

Mages

Phase 1: Follow the MT and split off with your group. Follow the DPS calls, however, save your mana and do not use it during Phase 1. You need to have access to a full mana pool, Mana Ruby and Evocation in Phase 2.

Phase 2: Spread out. Full DPS on Onxyia at all times. Use fire ward constantly to protect yourself against lava spits. Use all your mana replenishing tools here.

Phase 3: As Onxyia enters phase 3, stop all DPS. Sit down and regen mana. Follow the Raid Leader’s calls. Control yourself when feared, move back and forth. Full DPS when Onxyia reaches 5%.

Paladins

Phase 1: Follow the MT and split off with your group. Follow the DPS calls, however, stay away from Onyxia’s tail. Provide backup healing to the MT and your group if required.

Phase 2: Spread out. Provide backup healing to members in your group, and section as required. Once the Whelps have come out, switch to killing them as quickly as possible. Use consecrate and any means necessary to get the whelps off casters and other damage dealers. Do not move too far away from your healer.

Phase 3: As Onxyia enters phase 3, stop all DPS. Healing on the MT to keep him alive, especially when Onxyia reaches 5%. Heal your group as a second priority. Try and cleanse fear.

Priests

Phase 1: Follow the MT and split off with your group. Healing priority is given to the MT and then your group.

Phase 2: Spread out and keep your group healed. Keep your DOTs on Onxyia, however do not DOT after she reaches 43%. Second priority healing is given to whichever group you are in, odds or evens. Conserve your mana if possible.

Phase 3: All healing on MT. Place Shadow Protection buff on the MT. Keep the MT alive, especially when Onxyia reaches 5%.

Rogues

Phase 1: Follow the MT and split off with your group. Follow the Raid Leaders calls. Stay away from Onxyia’s tail.

Phase 2: Spread out. You can attack Onxyia if you are directly below her. If the Paladins and Warriors are having trouble clearing the whelps, switch to whelp duty. Use bandages where needed.

Phase 3: Stop DPS. A small group of whelps will come out. Remove these as quickly as possible. Follow the DPS calls. When Onxyia hits 5%, full DPS to bring her down.

Warlocks

Phase 1: Follow the MT and split off with your group. Follow the Raid Leaders calls. Conserve mana for the Phase 2.

Phase 2: Spread out. All DOTs on Onxyia up until 43%. Full DPS on Onxyia at all times. The Doom curse should be kept on her until 45%.

Phase 3: Stop DPS. A small group of whelps will come out. Sit down and regen mana. Follow the Raid Leader’s calls. Control yourself when feared, move back and forth. Full DPS when Onxyia reaches 5%.

Warriors

Phase 1: Follow the MT and split off with your group. Follow the Raid Leaders calls. Stay away from Onxyia’s tail.

Phase 2: Spread out. When whelps come out, clear the whelps as soon as possible. Keep in the range of healers and use bandages where needed.

Phase 3: Stop DPS. A small group of whelps will come out. Remove these as quickly as possible. Follow the DPS calls. When Onxyia hits 5%, full DPS to bring her down.

MC Update: SI > Magmadar

Congratulations everyone! Mags is DEAD. After a very quick run through to Luci, who was killed without much trouble, we turned out attention to Magmadar.

The group did a great job…who says you need a Dwarf Priest to kill Mags?!

Congratulations to all those who received [color=indigo”>epics[/color”> today:
Aylwin – Nightslayer Belt
Elco – Gauntlets of Might
Idreal – Cenarion Leggings
Loomer – Quick Strike Ring
Spunkie – Arcanist Leggings
Tarianis – Cenarion Boots

Tomorrow, we’re back at it again. Just a reminder to those to sign up for our runs!! ๐Ÿ™‚

[align=center”>

Guild Update

Just an update on guild events for everyone!

Wed night, we had a good time at BWL. It was very interesting to see another instance – it’s all a learning experience.

Last weekend, we had another great time in MC, where Luci was defeated, and Mags was brought down to 21%. Once again on Saturday we had zone in and summoning issues, but still defeated Luci with 32 players – only 2 of which were paladins. And considering the amount of cleansing you have to do, that is an achievement!

This weekend we’re hoping to top that performance (with more pallies though). Congratulations to the following people with their items:
Awen – Cenarion Boots
Elco – Flamewaker Legplates
Spade – Lawbringer Bracers
Undibear – Lawbringer Bracers

PS. To the Luci loot table, can we please have something different other than Cenarion Boots! (Drop rate of 4 out of 5 times is a little high!)

Friday night we’re once again facing Onxyia. If you’re interested, please sign up at the forums ๐Ÿ™‚