Nefarian – Dead.

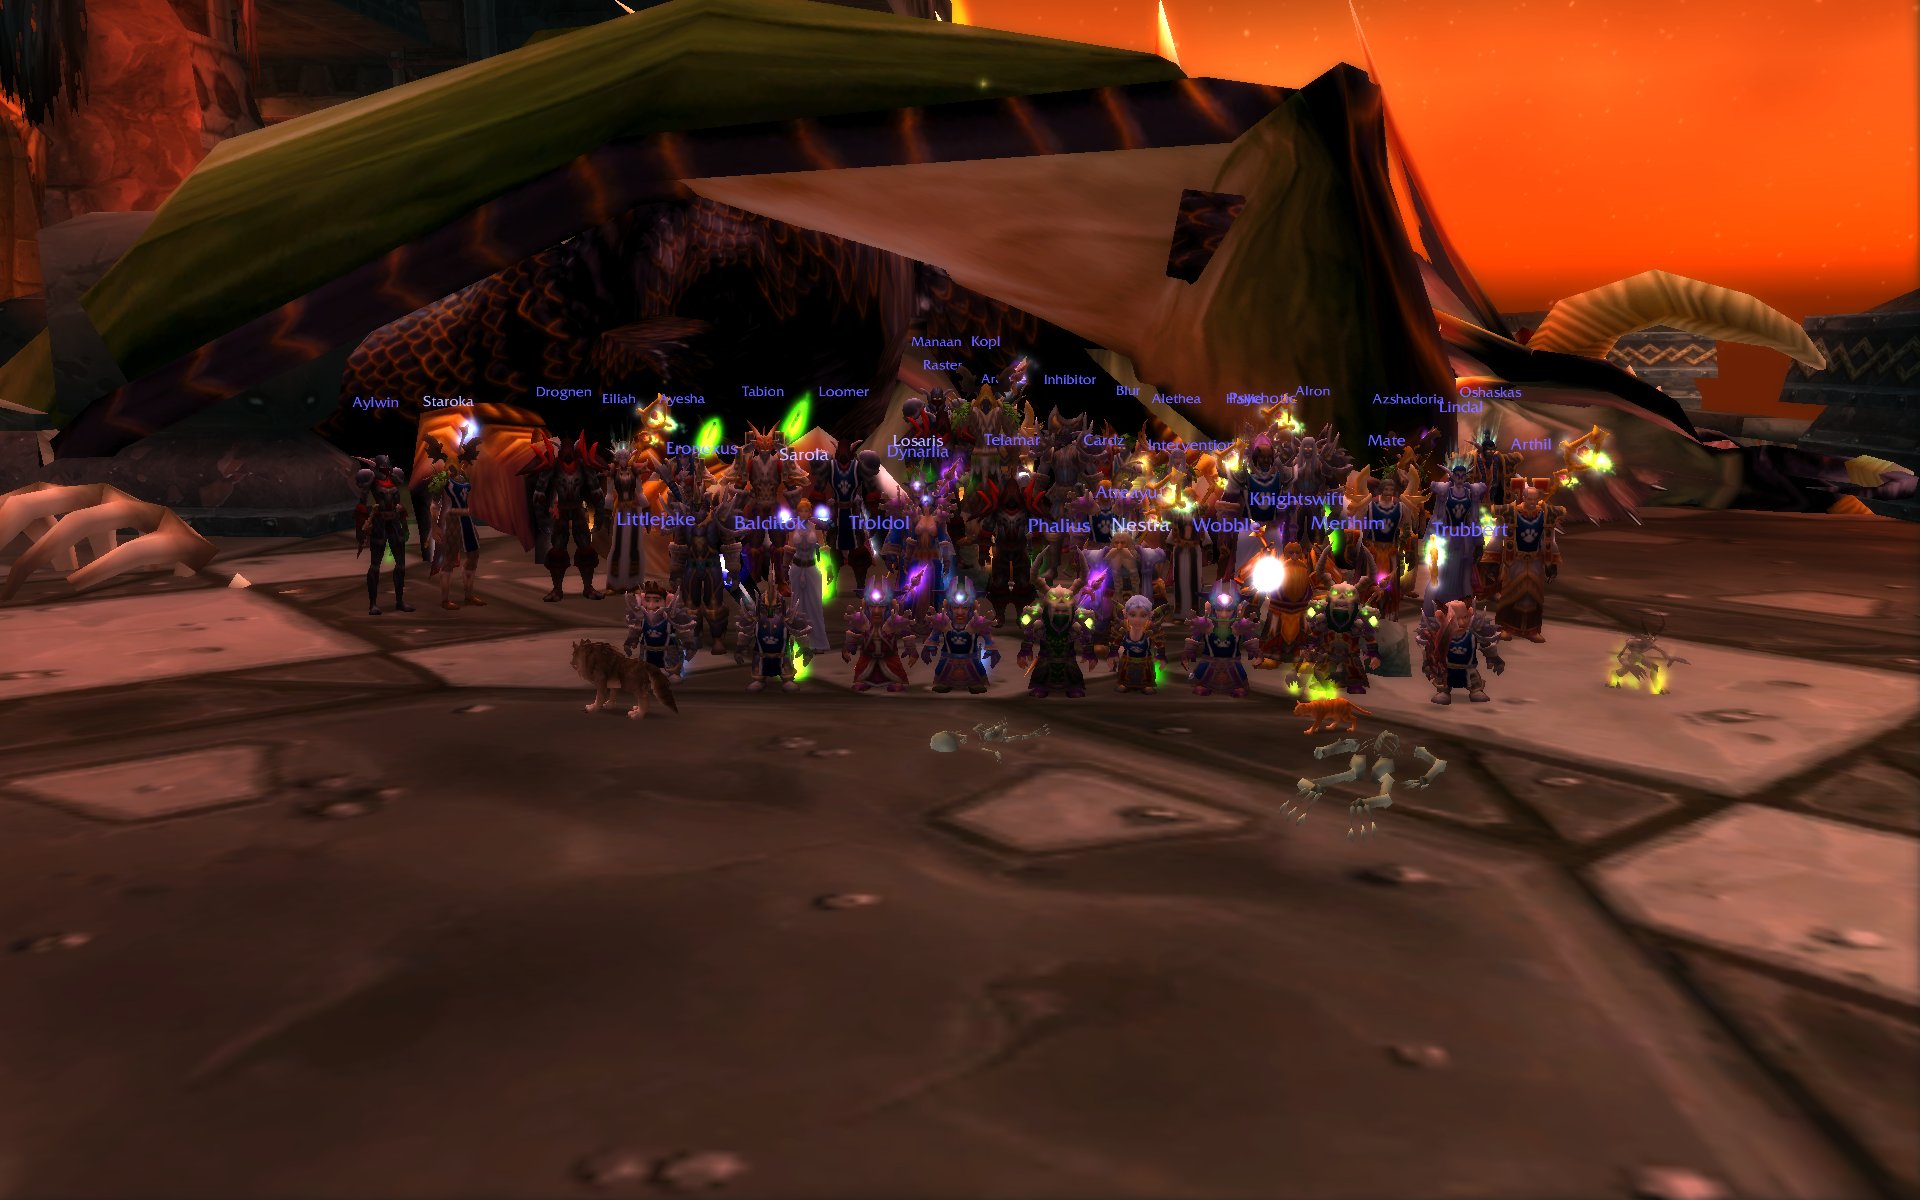
Nefarian has been slayed by Strangely Ironic (and our mish-mash of Geek Legion groupies):

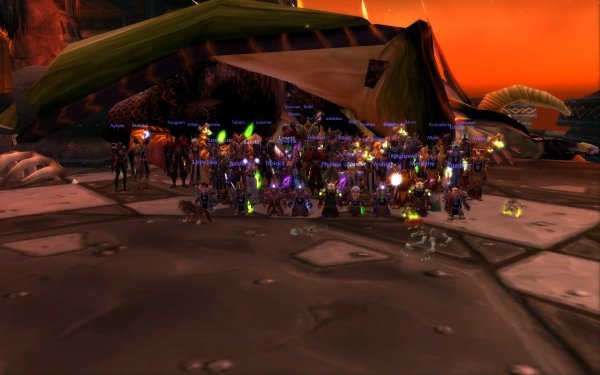
You can view the bigger version here.

Awesome effort to all who attended, all who’ve assisted in the past and the friends who’ve egged us on.

Well done guys!

The day before, we cleansed MC in a record 2h37m – so grats on that also!

March Guild Update

Well, while we have been busy trying to organise how to fit in all the raids into our schedule, the guildies have been trying to devise methods to automate our jobs more:

And we’ve been working really really hard on making our complex strategies simple to ensure less wipes:

Raiding has been really fun. Especially when when Fidi found out that they had a real life snake in their house:

Congratulations to ZG2 killing Hakkar for the first time.
And Congratulations to AQ20 for killing Ossirian last week ๐Ÿ˜€

Class Preference Loot Table – Black Wing Lair

As some classes can better use an item than others, a class locking system has been implemented.

There will be open bid on items until they reach a 500 DKP value. Once they reach the 500 DKP value, then it is class preference locked.

If none of the attendees from the class preference lock wish to bid on the items (or they already have the item), then it is once again open to those classes that can use it.

Item Class Locked (Preference given) >500DKP
Angelista’s Grasp (Waist) Mage, Warlock
Archimtiros’ Ring of Reckoning (Finger) Warrior
Ashjre’thul, Crossbow of Smiting (Bow) Hunter
Ashkandi, Greatsword of the Brotherhood (2H Sword) Paladin, Warrior
Band of Dark Dominion (Finger) Warlock
Band of Forced Concentration (Finger) Mage, Warlock
Black Ash Robe (Chest) Mage, Priest, Warlock
Black Brood Pauldrons (Shoulder) Hunter, Paladin
Boots of Pure Thought (Feet) Priest
Boots of the Shadow Flame (Feet) Rogue
Bracers of Arcane Accuracy (Wrist) Mage, Warlock
Chromatic Boots (Feet) Warrior
Chromatically Tempered Sword (1H Sword) Rogue
Circle of Applied Force (Finger) Hunter, Rogue
Claw of Chromaggus (Dagger) Mage, Warlock
Claw of the Black Drake (Fist) Rogue, Warrior
Cloak of Draconic Might (Back) Paladin, Warrior
Cloak of Firemaw (Back) Hunter, Rogue
Cloak of the Brood Lord (Back) Mage, Warlock
Crul’shorukh, Edge of Chaos (1H Axe) Warrior
Doom’s Edge (1H Axe) Hunter
Draconic Avenger (2H Axe) Paladin, Warrior
Draconic Maul (2H Mace) Druid, Paladin, Warrior
Dragon’s Touch (Wand) Mage, Warlock
Dragonbreath Hand Cannon (Gun) Hunter
Dragonfang Blade (Dagger) Rogue
Drake Fang Talisman (Trinket) Hunter, Rogue
Drake Talon Cleaver (2H Axe) Warrior
Drake Talon Pauldrons (Shoulder) Warrior
Ebony Flame Gloves (Hands) Warlock
Elementium Reinforced Bulwark (Shield) Warrior
Elementium Threaded Cloak (Back) Warrior
Emberweave Leggings (Legs) Hunter
Empowered Leggings (Legs) Priest
Essence Gatherer (Wand) Priest
Firemaw’s Clutch (Waist) Mage, Priest, Warlock
Girdle of the Fallen Crusader (Waist) Paladin
Gloves of Rapid Evolution (Hands) Priest
Heartstriker (Bow) Hunter
Helm of Endless Rage (Head) Warrior
Herald of Woe (2H Mace) Druid, Paladin
Interlaced Shadow Jerkin (Chest) Rogue
Legguards of the Fallen Crusader (Legs) Paladin
Lok’amir il Romathis (1H Mace) Druid, Paladin, Priest
Maladath, Runed Blade of the Black Flight (1H Sword) Rogue, Warrior
Malfurion’s Blessed Bulwark (Chest) Druid, Rogue
Mantle of the Blackwing Cabal (Shoulder) Mage, Warlock
Mish’undare, Circlet of the Mind Flayer (Head) Mage, Warlock
Neltharion’s Tear (Trinket) Mage, Warlock
Pendant of the Fallen Dragon (Neck) Druid, Priest
Primalist’s Linked Legguards (Legs) Hunter, Paladin
Primalist’s Linked Waistguard (Waist) Hunter
Prestor’s Talisman of Connivery (Neck) Hunter, Rogue
Pure Elementium Band (Finger) Druid, Priest
Red Dragonscale Protector (Shield) Paladin
Rejuvenating Gem (Trinket) Druid, Priest
Ring of Blackrock (Finger) Druid, Paladin, Priest
Ringo’s Blizzard Boots (Feet) Mage
Shadow Wing Focus Staff (Staff) Druid, Mage, Warlock
Shimmering Geta (Feet) Priest
Shroud of Pure Thought (Back) Druid, Paladin, Priest
Spineshatter (1H Mace) Warrior
Staff of the Shadow Flame (Staff) Mage, Warlock
Styleen’s Impeding Scarab (Trinket) Warrior
Taut Dragonhide Belt (Waist) Rogue
Taut Dragonhide Gloves (Hands) Druid
Taut Dragonhide Shoulderpads (Shoulder) Rogue
The Untamed Blade (2H Sword) Paladin, Warrior
Therazane’s Link (Waist) Hunter

ZG Boss ,2 – High Priest Venoxis

What does High Priest Venoxis do?

Stage 1

  • Holy Nova – Does AOE holy damage to those around them.
  • Holy Fire – Holy damage targeted at the person with aggro.
  • Renew – Casts renew on himself. This can be dispelled by a priest.
  • Holy Wrath – A spell which jumps from person to person with damage increasing exponentially.

Stage 2 (50%)

  • Poison Cloud – Creates a poison cloud around him that does damage to anyone in the vicinity.
  • Parasites – Parasites spawn, and if they reach their intended victim, the victim is infected and loses health very quickly. These parasites can be killed easily via AOE or melee.

Positioning & Pull

  • The OT pulls Venoxis with his four adds.
  • The MT then engages Venoxis, while the OT pulls the adds to the raid.
  • The adds are then AOE’d until they are all dead.

The Fight

Stage 1

  • The OT pulls the adds, with the MT tanking Venoxis.
  • The adds are AOE’d until they are dead. Once the adds are dead, all dps on Venoxis.
  • The raid must either stand within melee range, or at full range of Venoxis. If they stand midway, the Holy Wrath spell which jumps from person to person will be activated.
  • Dispell magic is cast on Venoxis and when he casts Renew on himself, the priests will dispell this renew.
  • At 50% he will transform into a snake.
  • No mana drain is needed on this boss.

Stage 2

  • Venoxis will change into a snake, and create a poison cloud around him.
  • All melee move out and change to ranged DPS.
  • Mages are in charge of AOE the parasites that spawn and infect people they target.

From a class point of view

Druids
  • Heal the MT, then your party then the raid.
Hunters
  • DPS.
Mages
  • AOE the adds.
  • Stage 1: Cast detect magic on the boss. DPS the boss.
  • Stage 2: AOE the parasites that spawn. DPS the boss.
Paladins
  • Heal the MT, your group and then the raid.
  • Stage 2: Cleanse the MT of the poison.
Priests
  • Heal the MT, your group and then the raid.
  • Stage 1: Dispell Renew when Venoxis casts it on himself.
Rogues
  • Stage 1: DPS.
  • Stage 2: Ranged DPS.
Warlocks
  • DPS.
Warriors
  • Stage 1: DPS.
  • Stage 2: Ranged DPS. (If you are not the MT.)

ZG Boss ,8 – Edge of Madness

Edge of Madness

The Summonable bosses in Edge of Madness drop items needed for your class trinket from Zul Gurub. There are 4 summonable bosses, and they are rotated every 2 weeks. You can determine which boss is currently available to kill by reading the tablets on the far wall. It will say that they reside at the Edge of Madness if they are available.

Gri’Lek

  • Melee Damage – He is tankable when not in his Beserker Rage.
  • Beserker – His size doubles and his attacks increase dramatically (5,000 damage hit on average). His movement in this form is dramatically slowed. In this form, he will choose one player as his target and chase that player only.
  • Tremor Ability – Causes stun and root effects in an area around him. This is dispellable.

The Fight

  • The MT tanks Gri’Lek as normal.
  • When he goes into his Beserker Rage, he will target one person. That person should be as far away from Gri’Lek as possible, as Gri’Lek’s movement is slowed dramatically when in this form. He is not tankable in this form, so everyone must move away from him.
  • He will stun and root those around him, so it needs to be a ranged fight. And Paladins need to dispell roots from those who get rooted to ensure they do not get caught in his Beserker Rage.
  • Other than when he is in Beserker Rage, it is DPS as usual.
  • Do not move onto the Log in the area – as this will cause an Evade bug and his health will regenerate to 100%.

Hazza’rah

  • Spawn Giant Horrors – These spawns are visions that Hazza’rah spawns. They hit very hard, but have about 500hp, so can be killed very quickly.
  • Random AOE Sleep – Hazza’rah has an AOE sleep that puts everyone into a sleep. If this is combined with the Giant Horrors, a lot of the raid can die very quickly.
  • Mana Burn – Mana burns casters around him.

The Fight

  • The MT tanks as normal.
  • All ranged dps should be on the spawns (Multishot is great here, as is Fireblast). The spawns must be killed as soon as they appear.
  • Casters move out of the area as soon as possible.

Renataki

  • Vanish – Renataki is a rogue, and will vanish periodically and then randomly appear and ambush someone to do a bit of damage.

The Fight

  • The MT tanks as usual. A rogue can even tank him.
  • DPS him down.

Woosholay

  • Poison Cloud – Has a poison cloud around him, so melee need to keep their distance.
  • Hurricane – Nature damage AOE spell that affects those in the vicinity.
  • Lightnening Strikes – Targets people in front of him to get struck by lightening.

The Fight

  • The MT tanks. Keep him tanked facing away from the raid.
  • Melee must keep their distance.
  • If you are caught in the Hurricane, move as soon as possible.

ZG Boss ,10 – Hakkar the Soulflayer

What does Hakkar the Soulflayer do?

It is recommended that all the Priests in Zul Gurub must be killed before you attempt Hakkar. If they are not, they grant Hakkar their various abilities.

  • Mind Control Hakkar will periodically Mind Control the person who has aggro.
  • Life Tap – Every 90 seconds Hakkar uses his lifetap / bloodtap on everyone. If you have the poison from the Son of Hakkar on you, this will drain life from Hakkar. If you do not, Hakkar will gain life from each person he drains.
  • Enrage – 10 minutes into the battle, Hakkar will enter an enraged mode where he does a lot more damage. It is wise to kill him within 10 minutes.

Positioning & Pull

  • The raid stands back on the wooden platform.
  • The MT runs into Hakkar and tanks him where he stands. The 2nd MT then runs up to OT Hakkar, in preparation from when the MT gets Mind Controlled.

The Fight

  • The MT tanks Hakkar. The OT tanks Hakkar and steps in to MT when the MT becomes Mind Controlled.
  • Mages sheep the person who is Mind Controlled.
  • Once Mind Control finishes, the MT must be dispelled (once they have reached full health).
  • Hunters pull the Sons of Hakkar up to the top of the platform, and the raid kills them every 90 seconds. Everyone (except the MT) must get poisoned by the Son of Hakkar.
  • DPS must continue on Hakkar throughout the fight to ensure he is killed before the 10 minute timer. Otherwise he enrages and hits harder.

From a class point of view

Druids
  • Heal the MT, then your party then the raid.
Hunters
  • DPS Hakkar and the Sons as needed.
  • Pull the Sons of Hakkar to the platform 30 seconds before the Lifetap.
Mages
  • DPS Hakkar and the Sons as needed.
  • Polymorph the Mind Controlled Warrior.
Paladins
  • Heal the MT, your group and then the raid.
  • Dispell the Polymorphed warrior once they reach full health.
Priests
  • Heal the MT, your group and then the raid.
  • Dispell the Polymorphed warrior once they reach full health.
Rogues
  • DPS Hakkar and the Sons as needed.
Warlocks
  • DPS Hakkar and the Sons as needed.
Warriors
  • DPS Hakkar and the Sons as needed.
  • An MT and OT will be assigned to tank Hakkar.

ZG Boss ,1 – High Priestess Jeklik

What does High Priestess Jeklik do?

Stage 1

  • AOE Silence – this also does damage. It can be avoided if you are a certain disctance away from her.
  • Random Charge – she performs a random charge at raid members and knocks them over.
  • Summon Bats – Every minute she summons bats to periodically attack the raid.

Stage 2 (50%)

  • Shadow Word: Pain – Casts Shadow Word: Pain on people.
  • Mindflay – Has mindflay that affects 2-3 people in the raid simultaneously.
  • Greater Heal – Heals herself for 20-30% health at any one time.
  • Bomb Bats – Summons bats which drop fire bombs on the ground

Positioning & Pull

  • The MT pulls, with the raid group standing together at a distance from the MT.
  • The MT sunders Jeklik at least 2-3 times, and then the raid can start DPS.

The Fight

Stage 1

  • Apply as much DPS as possible, except for the casters.
  • Mages need to conserve mana and AOE the bats as they are summoned.
  • There is no need to drain mana in this fight.

Stage 2

  • Dispell Shadow Word: Pain as it gets put on people.
  • When she casts Greater Heal on herself, shield bash, kick or counterspell her. Even though it says she’s immune it will stop her healing.
  • Run out of the bat bombs as soon as possible. They have a greater range for damage than they appear to.

From a class point of view

Druids
  • Heal the MT, then your party then the raid.
Hunters
  • DPS.
  • Stage 2: Run out of the bat bombs if you are in the middle of it.
Mages
  • DPS.
  • Stage 1: Kill the bats as soon as possible with AOE.
  • Stage 2: Cast counterspell on Jeklik when she’s casting a heal.
Paladins
  • Heal the MT, your group and then the raid.
Priests
  • Heal the MT, your group and then the raid.
Rogues
  • DPS.
  • Stage 2: Run out of the bat bombs if you are in the middle of it.
  • Stage 2: Kick her when she is casting a heal.
Warlocks
  • DPS.
  • Stage 1: AOE the bats.
  • Stage 2: Run out of the bat bombs if you are in the middle of it.
Warriors
  • DPS.
  • Stage 2: Run out of the bat bombs if you are in the middle of it.
  • Stage 2: Shield bash her when she is casting a heal.